High Precision Measuring Solution for Bottle Cap Concavity Detection
Customer Challenge
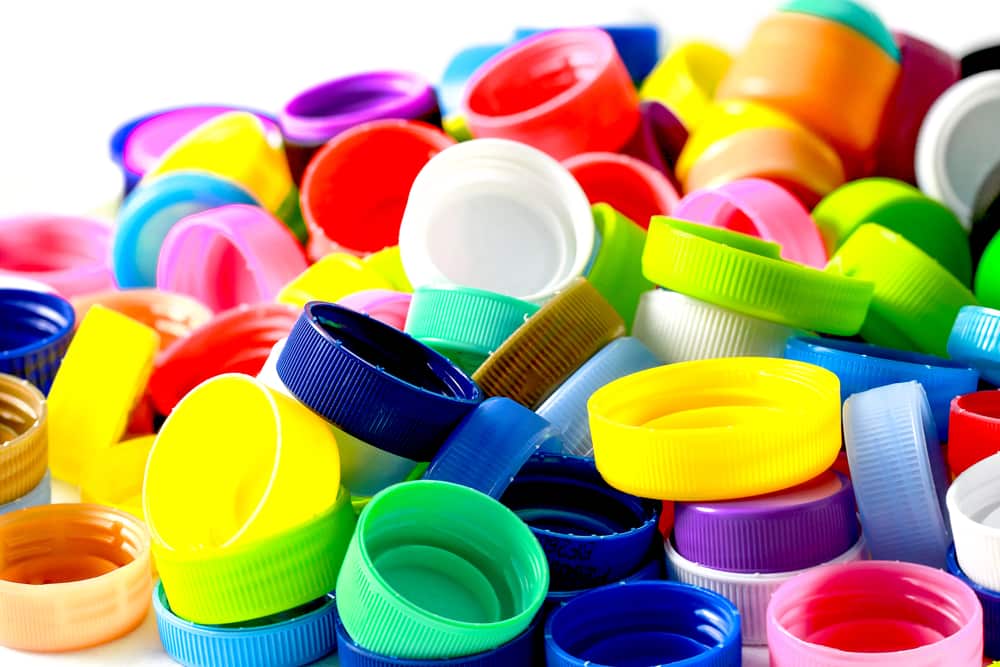
A Bottle Cap Manufacturer needs to know if the top of their bottle caps measure over .76 mm concave. If the bottle caps are over the .76 mm threshold, then the 3rd party Printing Company they ship the completed bottle caps to cannot print a logo on top of the cap. If the Printing Company finds a bottle cap that is too concave for printing then they send the entire shipment back to our customer. The Bottle Cap Manufacturer can make around 600 bottle caps per minute and needs to find a high precision measuring solution that can quickly and correctly detect concavity as a bottle cap sails by on the line.
A-tech Solution
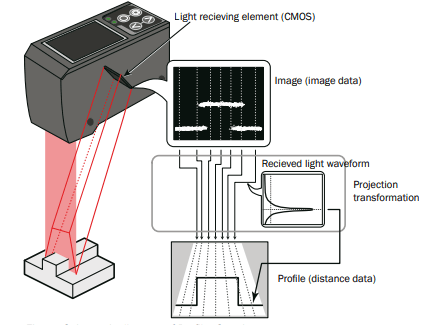
A-tech’s automation experts were able to find the best high precision measuring solution for our customer. The SICK Displacement measurement sensor, the Profiler 2, preforms high precision measurements by emitting a band-shaped laser beam and using a light-plane-intersecting method that triangulates the reflected light. With the light-plane-intersecting method, the reflected light from the emitted band-shaped laser beam is received by the light receiving element (CMOS), and the profile is then measured from the resulting image data. With the light-plane-intersecting method, two processes are used to determine the height and position.
• Triangulation: To determine the height, this process obtains the received light waveform (the waveform of the reflected light) for each vertical line of the image.
• Projection transformation: To determine the horizontal position, this process mathematically calculates the actual position from the image data.

The SICK Profiler 2 was installed and a test batch of 1000 caps went through production. Afterwards they did an extensive quality check by hand on all 1000 caps. None of the caps with over .76 mm concavity passed the Profiler measurement screening and they were all automatically removed from the line. The customer is thrilled with the results and excited to find more ways the Profiler can be used in additional applications at their facility.
Check out the SICK Profiler being used to measure bottle cap concavity in action in the video below.
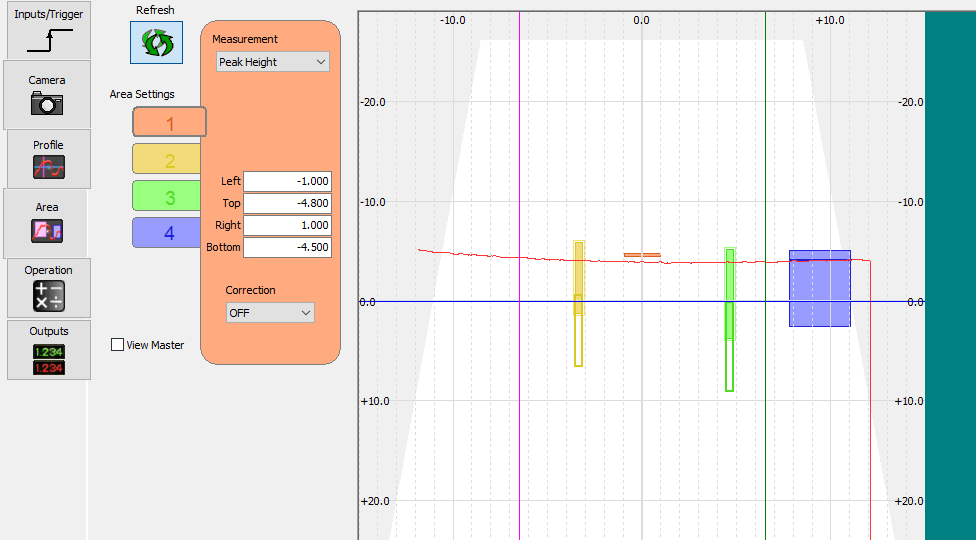
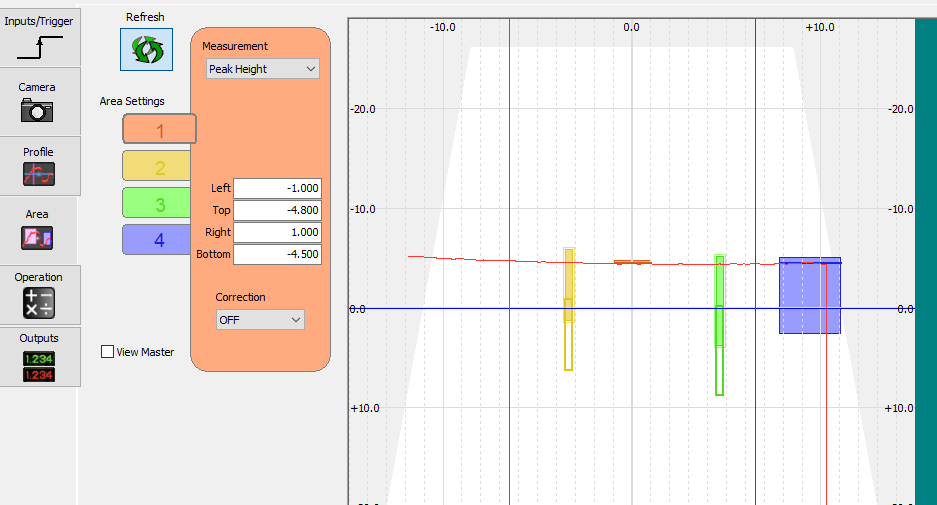
Figure 1 shows an example of a bottle cap that did not meet the parameters set for the allowed concavity and must be taken out of the order and reproduced. Figure 2 shows a bottle cap where the concavity fell within the acceptable range and can be sent to the Printing company. The red line in Figure 1 & 2 is the concavity of the bottle cap and the orange rectangle is the targeted concavity range.


Customer Benefit
Our customer was previously using a laser that wasn’t able to catch everything. Therefore, they had their QA team doing random checks by hand with a micrometer after each batch. The random checks by hand helped them find bad caps, but it is time consuming and still left the possibility for bad caps to make it to the Printer. When the Printing Company rejects an order and sends it back to the Bottle Cap manufacturer, the rejected shipment of caps must be melted back down and reproduced. That cost the manufacturer time and money and why it was imperative to find them a more consistent concavity detection solution.
A-tech offers complimentary services to our customers such as consulting and on-site engineering assistance. We are always happy to answer any questions. If you are interested, please do not hesitate to get in touch with us.
For more information contact A-tech @ 800.225.6102
